Texas Flying Legends’
by Chuck Cravens


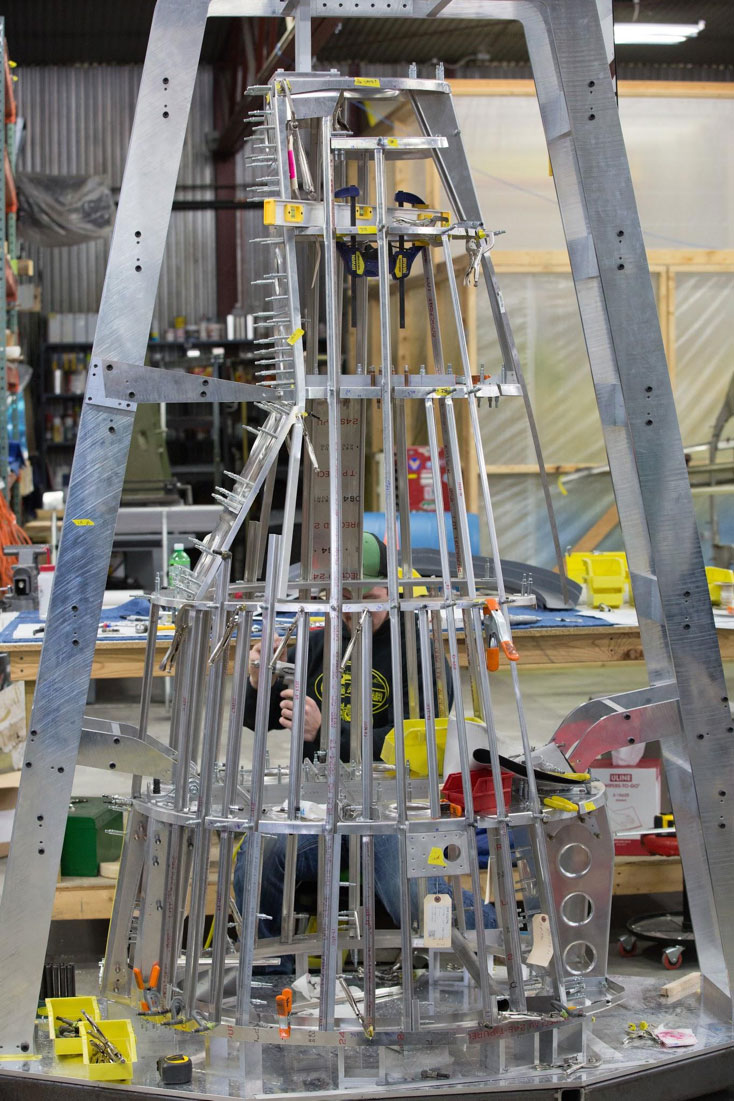
A view from the other side as Hunter works, there are a lot of those clips to put in!
Last Month…
The horizontal stabilizer came out of its fixture. The disassembly of the fuselage took upmany of the work hours last month as well.
In the restoration shop, the fuselage disassembly process continued into this month. Actual assembly work in November and early December focused on the tail cone. The frames were mounted in the fixture and stringers, brackets, and other parts found their way into the assembly.
The fab shop machined wing mounting crossties and fittings, crash skid parts, and some fuselage fittings. Those will be used as the fuselage progresses.
This Month…
Compact discscontaining microfilm from the 5th Air Force Fighter Squadrons arrived from the Air Force Historical Research Agency. The histories of every squadron that had P-47s during the correct time frame were ordered.
They include :
• The 39th, 40th and 41st Fighter Squadrons from the 35th Fighter Group
• The 69th, 310th and 311th Squadronsfrom the 58th Fighter Group
• The 340th, 341st , 342nd and 460th Fighter Squadrons from the 348th Fighter Group.
There are several thousand pages on each of seven CDs to look through. Once the pages that cover May through September of 1944 are located in each Squadron’s history, they will be read carefully for clues to our P-47’s war history.
Fuselage Disassembly

Robb and Randy continue work on fuselage disassembly.

This view is from the rear of the fuselage.
Wing Attachment Fittings

This image is of an original wing attachment fitting that suffered corrosion while sitting out in the weather for decades. Despite its rough condition, it is useful as a partial pattern for recreating a serviceable part.

One of the wing crosstie fittings is even more corroded.

Fuselage upper tie fittings are shown here. These are part of the fuselage firewall extension assembly.

This is a lower tie fitting.

Steve with more fuselage fittings he is finishing in the fabrication shop.

A different view of the fuselage fittings as they sit on a fab shop bench.

Original fuselage fittings and ribs sit on a shelf. In most cases they will be used as patterns for new parts.

More original parts for inspection and use as patterns.
Tail Cone Assembly

Cross ties and crash skid parts that will go in the forward fuselage are show here.
They would have been extrusions at the Evansville, Indiana plant where 42-27609 was built. For small numbers of parts as in a single restoration, machining is more economically practical.

As tail cone assembly begins, the forward frames are attached to the fixture.
The tail cone is oriented vertically in the fixture with the aft most end up. The fixture was constructed using photos from inside the Republic factory for reference.

A closer view of the tail cone fuselage frames shows some of the fittings. They are mounts for various tailwheel connections.

On the lower side of the same frame are the lower tail wheel attach fittings.

At the bottom of the fixture is the is the next station forward of the tail wheel bay. It is the forward frame of the tail cone and is joined to another frame in the fuselage forward section when the main assembly is done. You can see the lower tail wheel attach fitting at the top.

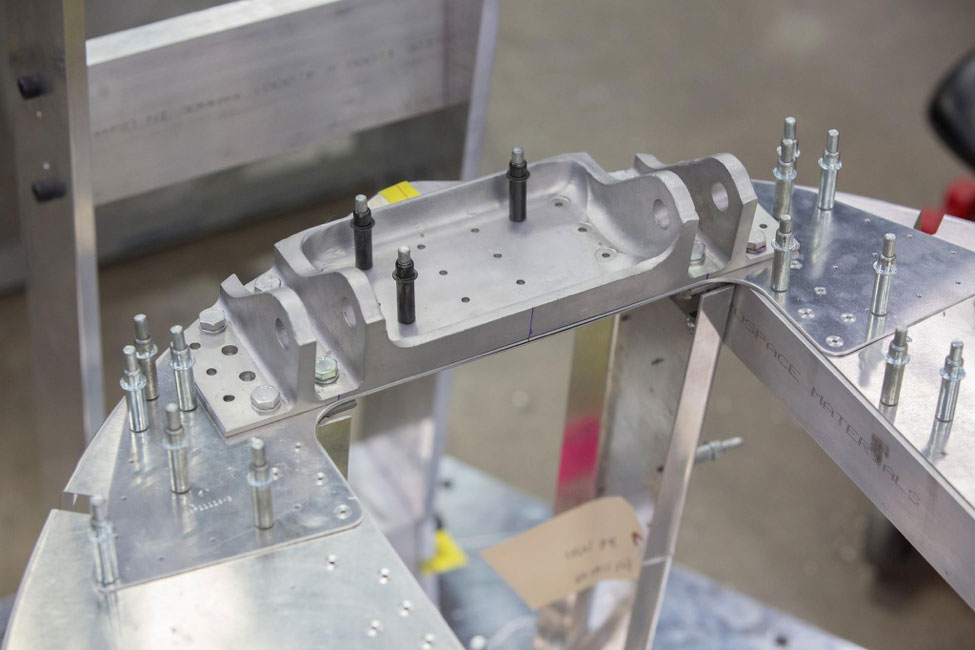
This fitting is the upper fuselage tail wheel attach fitting.

Hunter is cutting fuselage stringers to the correct length.

Hunter drills for another clip.

Near the rear of the fuselage are stringer reinforcements and the jack point support bracket.


Many stringer and frame pilot holes must be drilled as assembly progresses.
